For many buyers in the shade product wholesale or distribution business, product quality is just one piece of the puzzle. The installation process often makes or breaks the end-user experience. You’ve probably seen it happen—customers struggling to set it up, endless back-and-forths in after-sales support, or even worse, damaged products due to installation errors. All of that can hurt your brand’s reputation and lead to lost repeat sales.
To help wholesale clients better serve their customers and reduce installation-related support issues, LIDA OUTDOOR has put together this step-by-step retractable awning installation guide based on years of hands-on manufacturing and customer support experience.
Pre-Installation Checklist for Retractable Awnings
Before jumping into the installation of the awning, take a moment to plan ahead. A little prep goes a long way in making sure everything goes smoothly when you start the job.
1. Choose the Right Spot
Before you begin, pick a good spot for your retractable awning. It can be mounted on various hard surfaces like concrete walls, brick, wood, or light steel frames. Ceiling mounting is also possible. But here are a few things to keep in mind:
- Wall strength and surrounding conditions: Ensure the wall is strong enough to support the awning’s weight and regular use.
- Avoid high-wind areas: Upper floors or windy locations aren’t ideal. Strong gusts can damage the awning.
- Maximize shade coverage: Consider the sun’s direction ahead of time. Choose a spot where the awning can effectively block sunlight.
- Set the right height: We recommend installing it 8–12 feet (about 2.4–3.6 meters) above the ground. This gives enough room to move around.
- Leave enough space for full extension: Make sure there are no obstructions in the way when the awning opens fully.
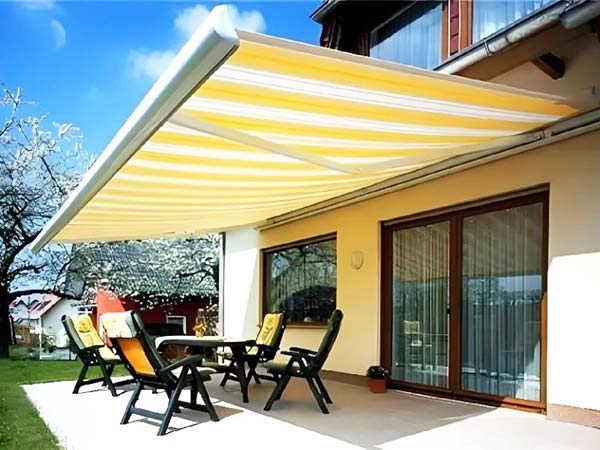
2. Gather Your Tools
You’ll need a few basic tools to get started. Here’s what to prepare:
- Power drill or hammer drill
- Level
- Measuring tape
- Marker or pencil
- Wrench
- Screwdriver
Some tools may vary depending on your wall type or mounting method.
3. Important Safety Notes
Before you start installing, you must remember three crucial safety tips. These steps are easy to overlook but can prevent serious damage or injury.
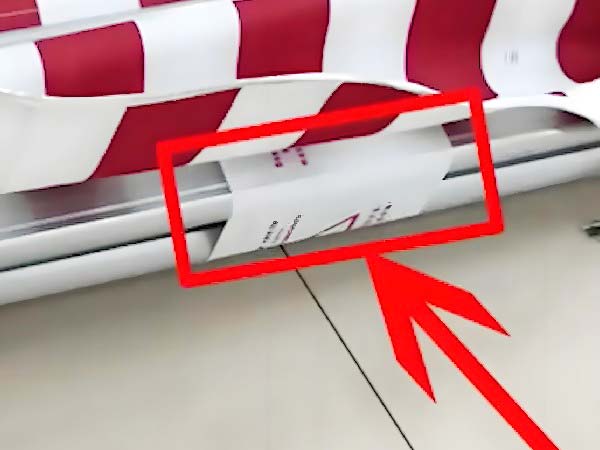
1) Never remove the arm protection strap early
The retractable arms are under strong tension. If you remove the strap before the awning is fully secured, the arms can spring open unexpectedly. This might damage parts or even injure someone nearby.
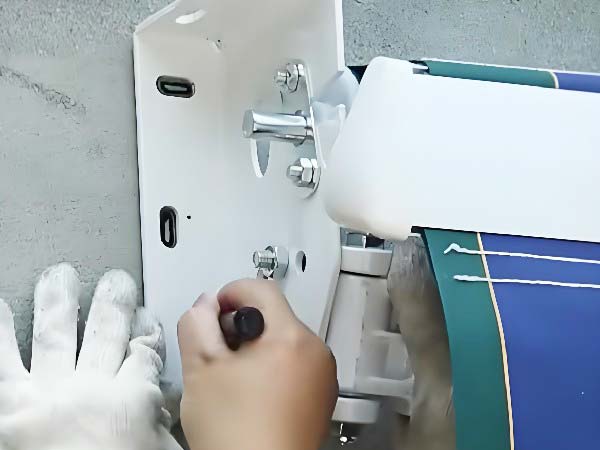
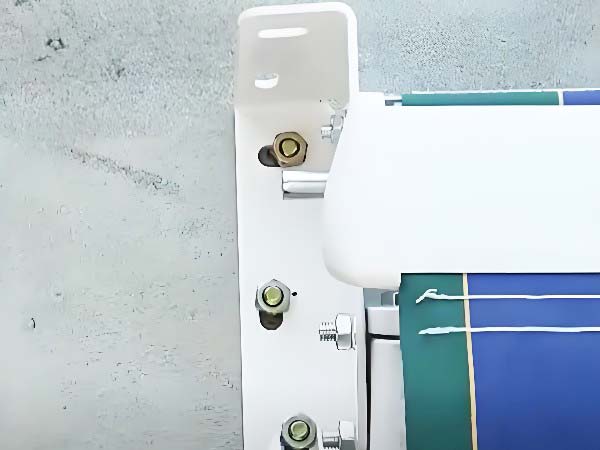
2) Make sure the mounting plate fits tightly against the rear shaft
When drilling the mounting holes, ensure the mounting plate sits flush against the rear shaft with no gaps. The plate should also be level. If there’s a visible gap or the plate is tilted, it can cause unnecessary wear and shorten the awning’s lifespan.
3) Adjust the awning tilt to prevent water pooling
After installation, adjust the fabric’s angle so the awning slopes down. The angle between the fabric and the wall should be less than 70 degrees. This helps rainwater run off properly, avoiding water buildup that can damage the structure.
Retractable Awning Installation Guide [7 Steps]
Now let’s break down the full installation process into seven simple steps.
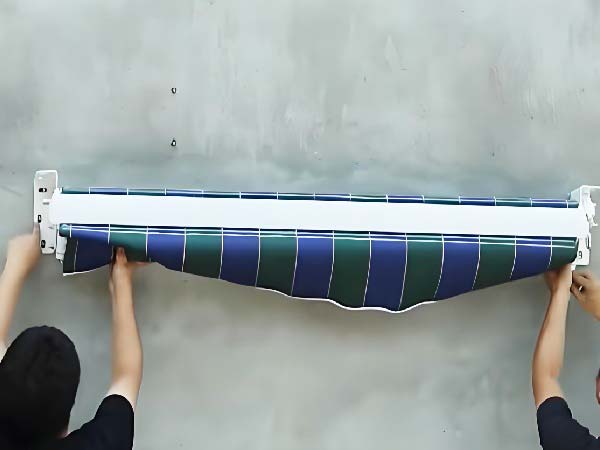
Step 1: Mark the Drill Points
Lift the retractable awning into position and mark where you’ll drill the holes. If you’re unsure whether it’s level, use a spirit level to help.
Step 2: Drill the Holes
Using a power drill or hammer drill, carefully drill into the marked points. These holes will hold the expansion bolts.
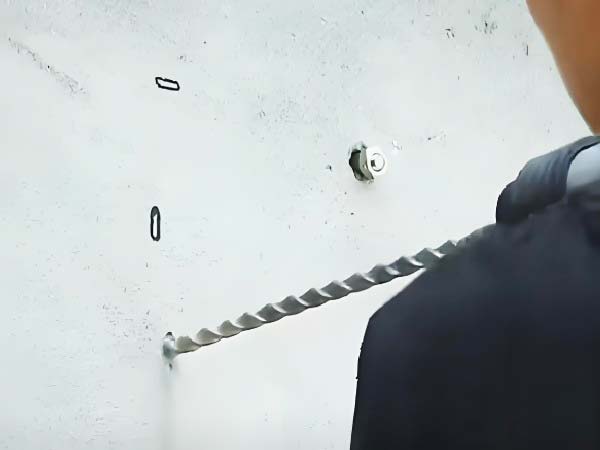
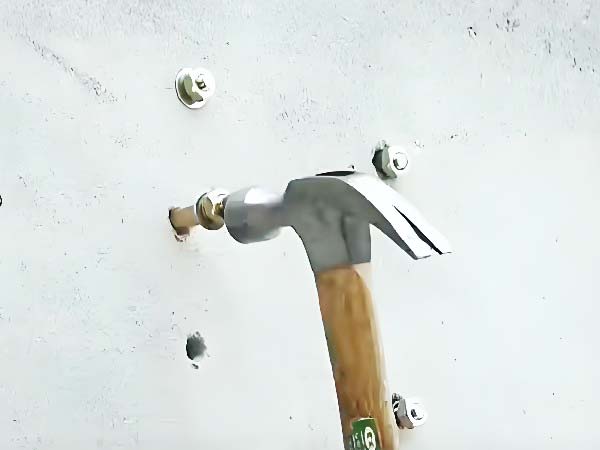
Step 3: Insert Expansion Bolts
Gently hammer the expansion bolts into the holes. Then unscrew the nuts to prepare for hanging the awning.

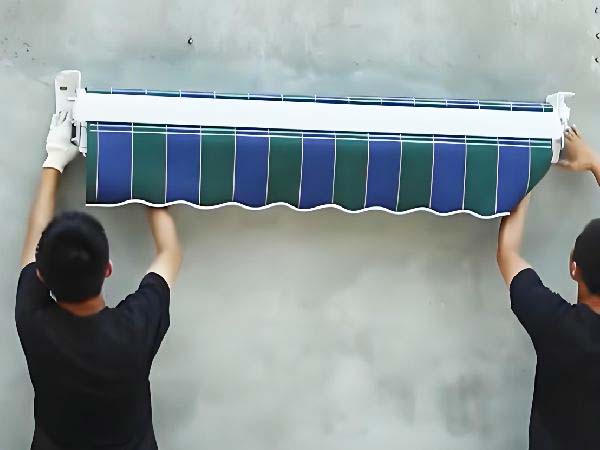
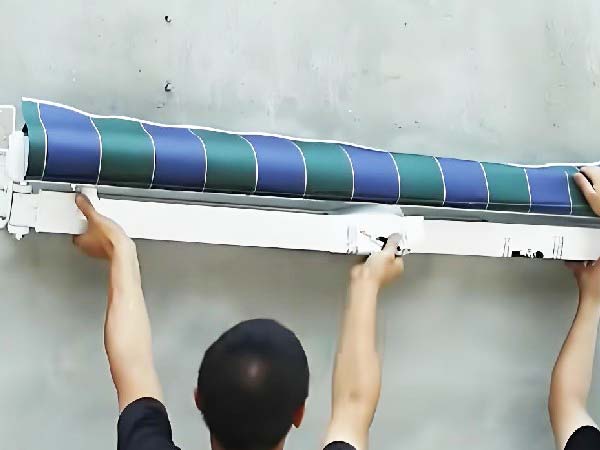
Step 4: Mount the Awning
Hang the awning body onto the expansion bolts. Tighten the nuts firmly to secure everything in place.
Step 5: Remove the Arm Protection Strap
Hold the retractable arms firmly with your hand. Then slowly remove the strap—don’t let the arms snap open suddenly.
Step 6: Extend the Fabric
For manual models, use the crank handle to roll out the fabric slowly. For electric ones, connect the power and use the remote to extend the awning.

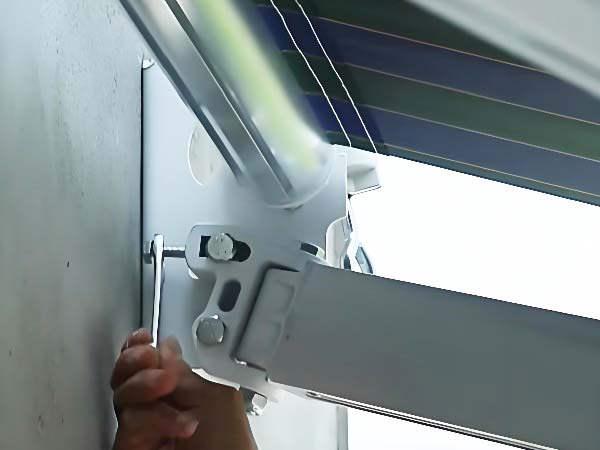
Step 7: Adjust the Tilt Angle
Once open, check if the fabric is flat and even. If not, adjust the tilt. This helps rain drain properly and avoids pooling. A tilt of around 30° is usually ideal (range: 20–70°).
Conclusion
That’s the full installation process for a retractable awning. From marking the holes to adjusting the tilt, we’ve broken down each step to help you and your customers install it smoothly and avoid costly mistakes.
At LIDA OUTDOOR, with over 20 years of experience in outdoor furniture manufacturing, we focus not just on solid product design and quality, but also on supporting our global wholesale partners. If you need to buy retractable awnings or find a matching installation manual? Branded how-to videos? Or ready-to-use FAQ templates for your end customers? We’ve got you covered. We’re here to help you save time, cut down on support issues, and keep your customers happy.